Gardens · container herb design
A Container Herb Garden Grouped by Watering Needs
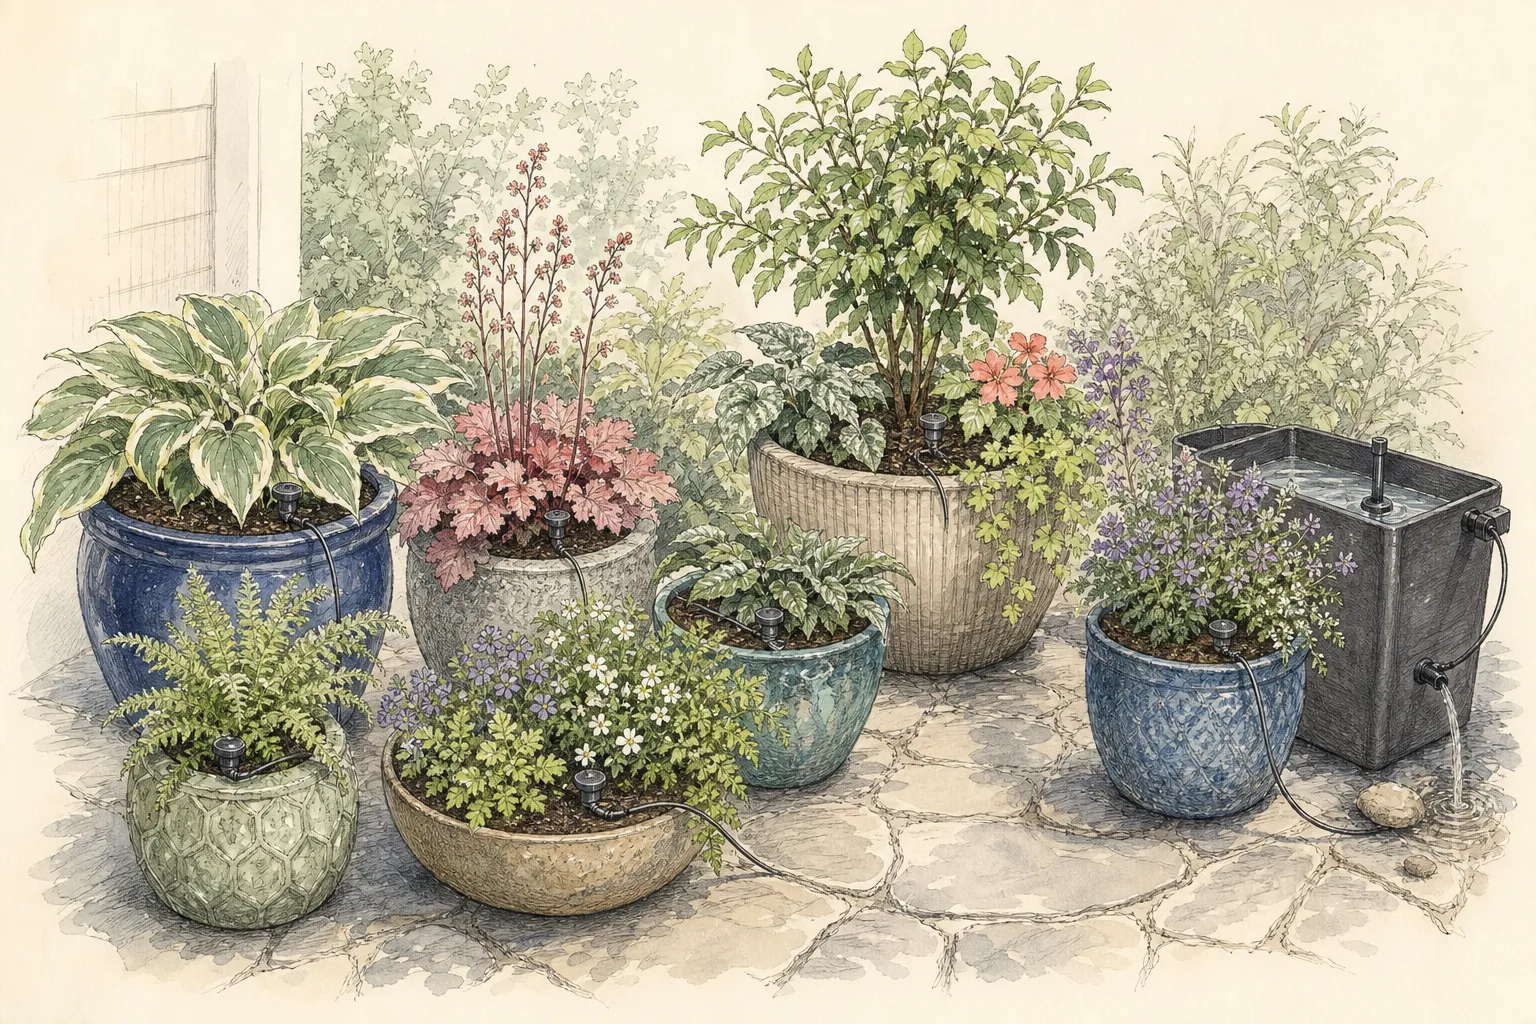
Compose several compatible herb pots as one small garden, preserving separate root zones while repeating container finishes, forms, and access paths.
Published Last updated
In this guide
- Draw the conditions before drawing the arrangement
- Turn the observations into watering zones
- Give compatible plants a shared root zone
- Size each pot for roots and water behavior
- Make separate pots read as one garden
- Preserve a service path through the composition
- Place three separate root zones on a Pennsylvania patio
- Design ideas
Draw the conditions before drawing the arrangement
Begin with the place, because a group of attractive pots cannot compensate for herbs growing in the wrong exposure. Watch the proposed area through a clear day and mark where direct sun begins and ends. Add the direction of persistent wind, surfaces that reflect heat, the nearest water source, and the route used to carry a full watering can. This becomes the base drawing against which every plant label and local recommendation must be tested.
Treat the map as a set of usable positions, not as a verdict that the whole patio has one climate. A wall may shelter one pot while an outer corner remains exposed; a railing or neighboring building may shorten direct light in another position. Put temporary objects where the pots might stand and observe the spaces again before buying plants. If a herb's verified light requirement does not fit a position, change the position or the plant rather than expecting watering to solve the mismatch.
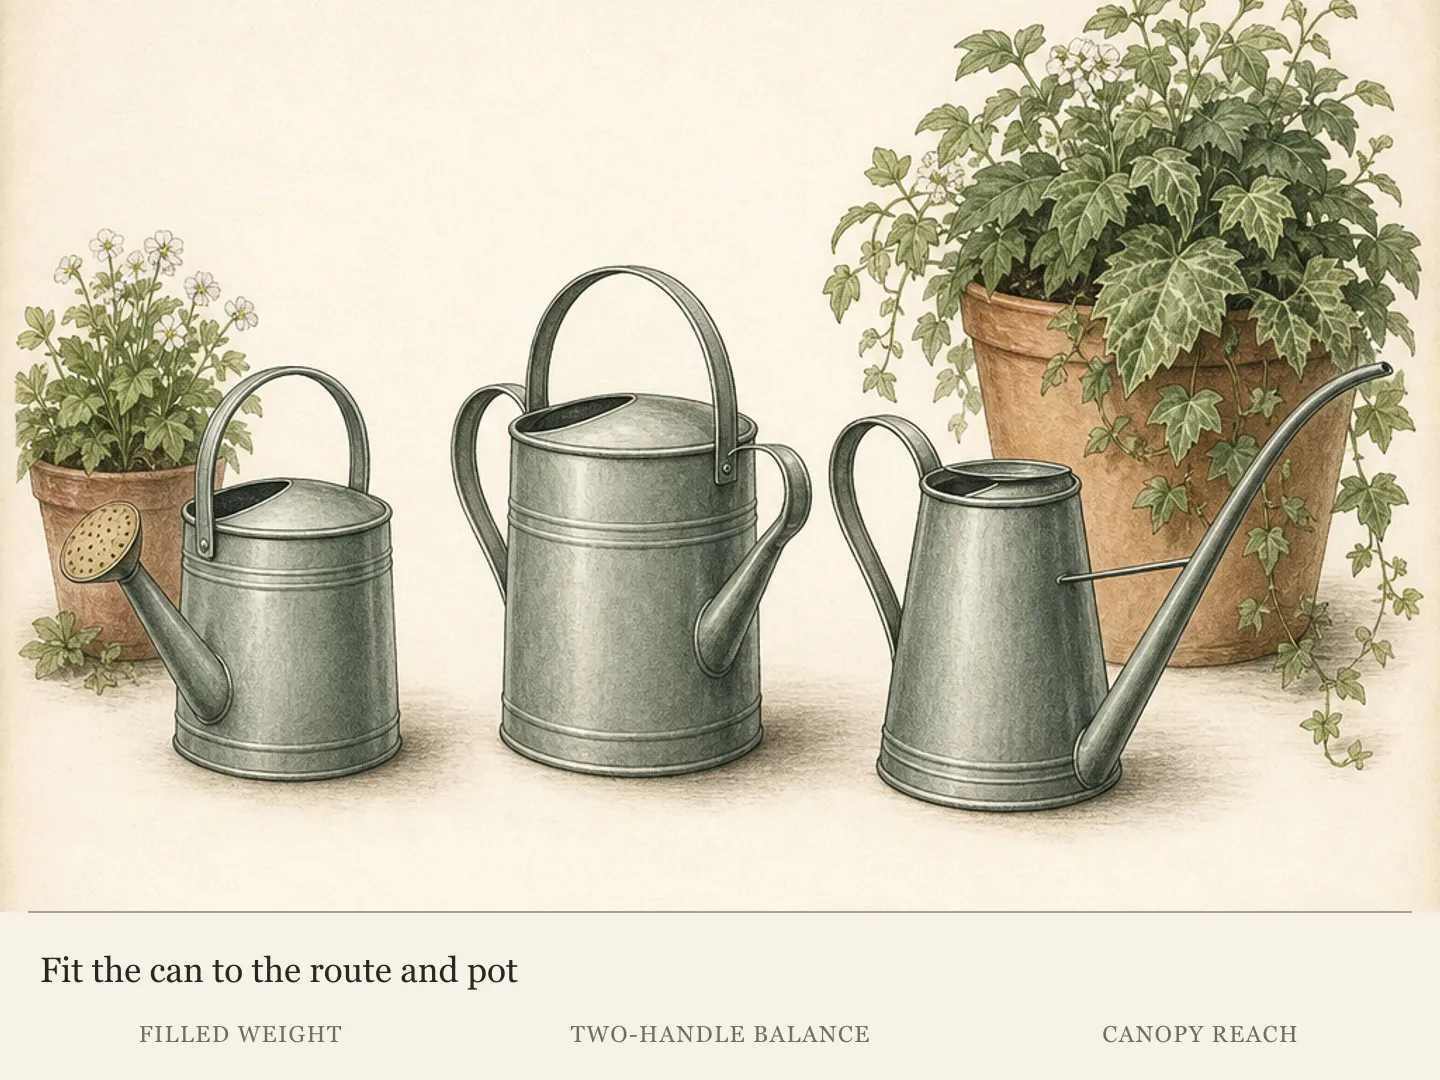
Include the working route on the same sheet. Mark doors, steps, seating, narrow turns, and any place where runoff would be troublesome. A full container must leave the route usable at its mature planted size, while the person watering it needs a direct view of the mix, drainage outlet, and saucer. These ordinary movements determine whether separate care zones will remain practical after the arrangement fills out.
A balcony or rooftop adds a structural question that a garden sketch cannot resolve. Wet mix, water, plants, and containers all contribute weight, and no load calculation is provided here. Use a ground-level or otherwise approved location unless a qualified building professional has confirmed the proposed load and placement. Keep this decision separate from plant styling; a visually suitable corner is not automatically a structurally suitable one.
Turn the observations into watering zones
Sort herbs by verified root-zone needs before assigning them a visual role. The useful question is whether plants can share the same mix, container volume, and watering decision through active growth. A culinary theme, leaf color, or nursery display does not establish that compatibility. Write each plant's botanical identity and label guidance beside its proposed pot, then circle only groups whose light and water needs agree.
Make the first zoning pass provisional. Established lavender, oregano, rosemary, sage, and thyme generally align around full sun and dry, well-drained conditions, but that shared Mediterranean pattern does not settle cultivar size, regional hardiness, or establishment care. Use it to create a dry-side candidate group, then check each selection individually. Place any herb needing steadier moisture in another group only after its own label or reliable local guidance confirms the fit.
Draw a boundary around each root zone even when the pots touch visually. One boundary may contain a shared multi-herb pot; another may contain two separate pots that happen to receive similar care. The marks clarify which containers can be checked together and which require an independent decision. They also prevent a repeated container finish from being mistaken for a repeated watering schedule.
Use removable plant labels or paper markers to test the grouping on the base drawing. Move a marker only after checking what changes with it: exposure, root partners, mature clearance, and the route for watering. If a visually desirable move separates a plant from suitable conditions, preserve the care position and look for continuity elsewhere through pot finish or foliage form. This simple rehearsal keeps the design hierarchy clear before heavy planted containers make revision difficult.
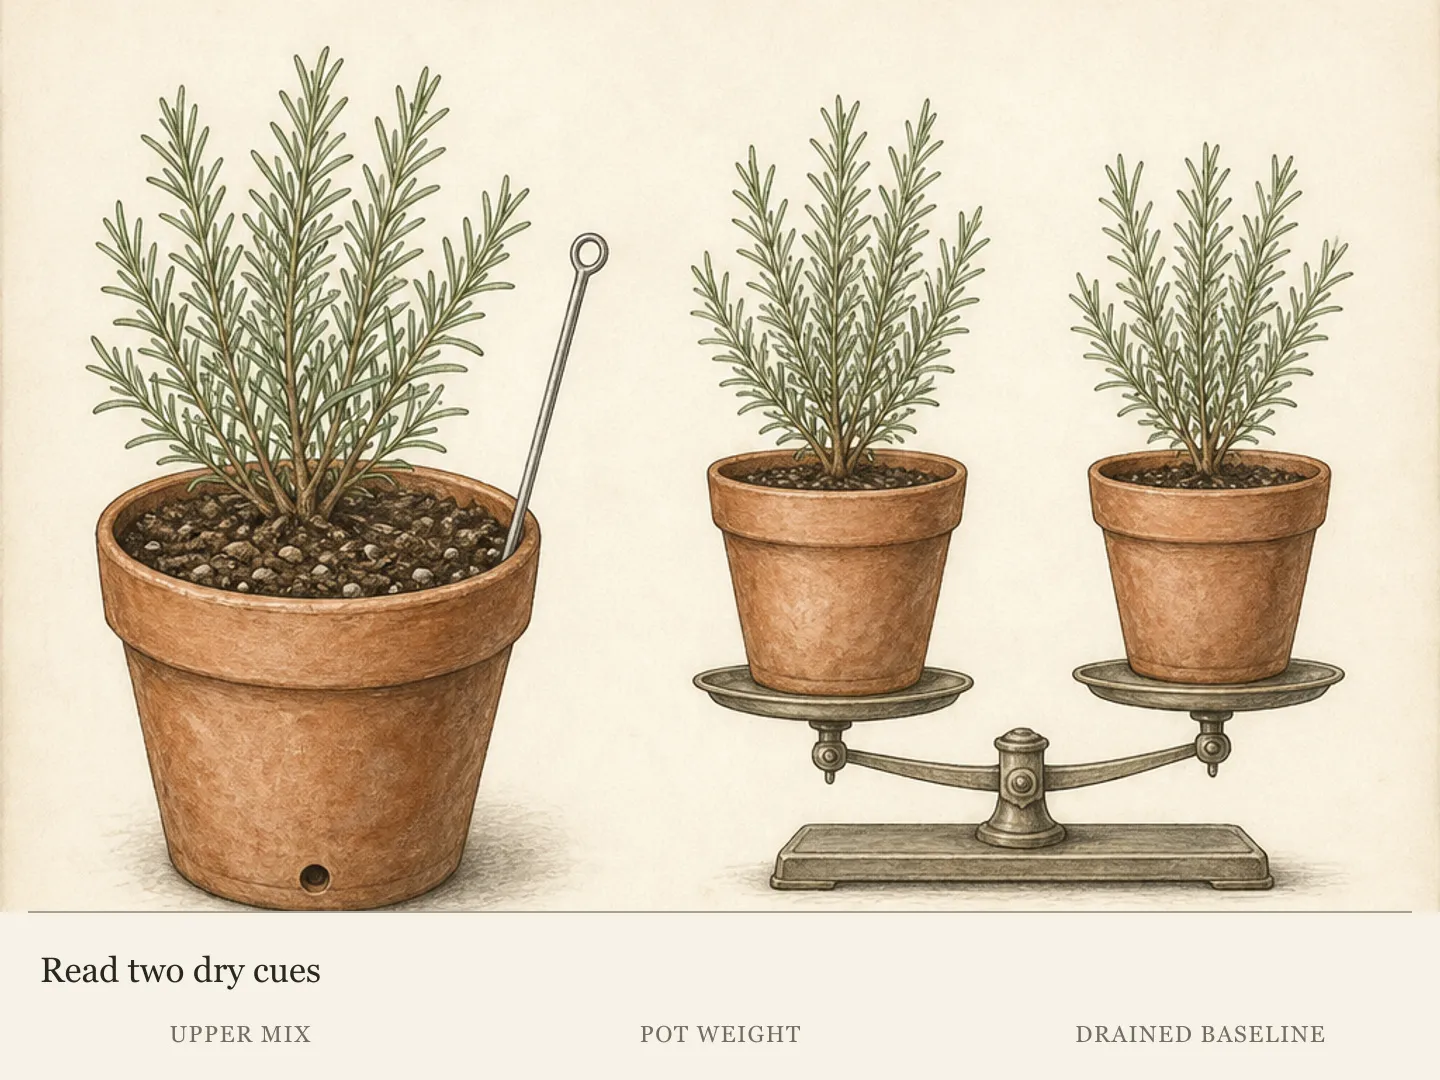
Keep a small observation space on the drawing for each zone. Note whether one pot dries appreciably faster than its neighbors after a complete watering, whether a sheltered pot stays wet longer, and whether access causes any zone to be overlooked. The first arrangement is a working hypothesis. Several watering cycles reveal whether the map reflects actual container behavior or only the conditions visible from above.
Give compatible plants a shared root zone
A shared pot is the smallest irrigation unit in the design. Every plant in it receives the same wetting event and occupies the same volume of mix, so similar needs are a condition of the arrangement, not a finishing preference. Compare mature height, width, and spacing as well as water demand. Plants that agree while young may become an awkward combination if one later shades the other, occupies most of the root volume, or blocks inspection of the surface.
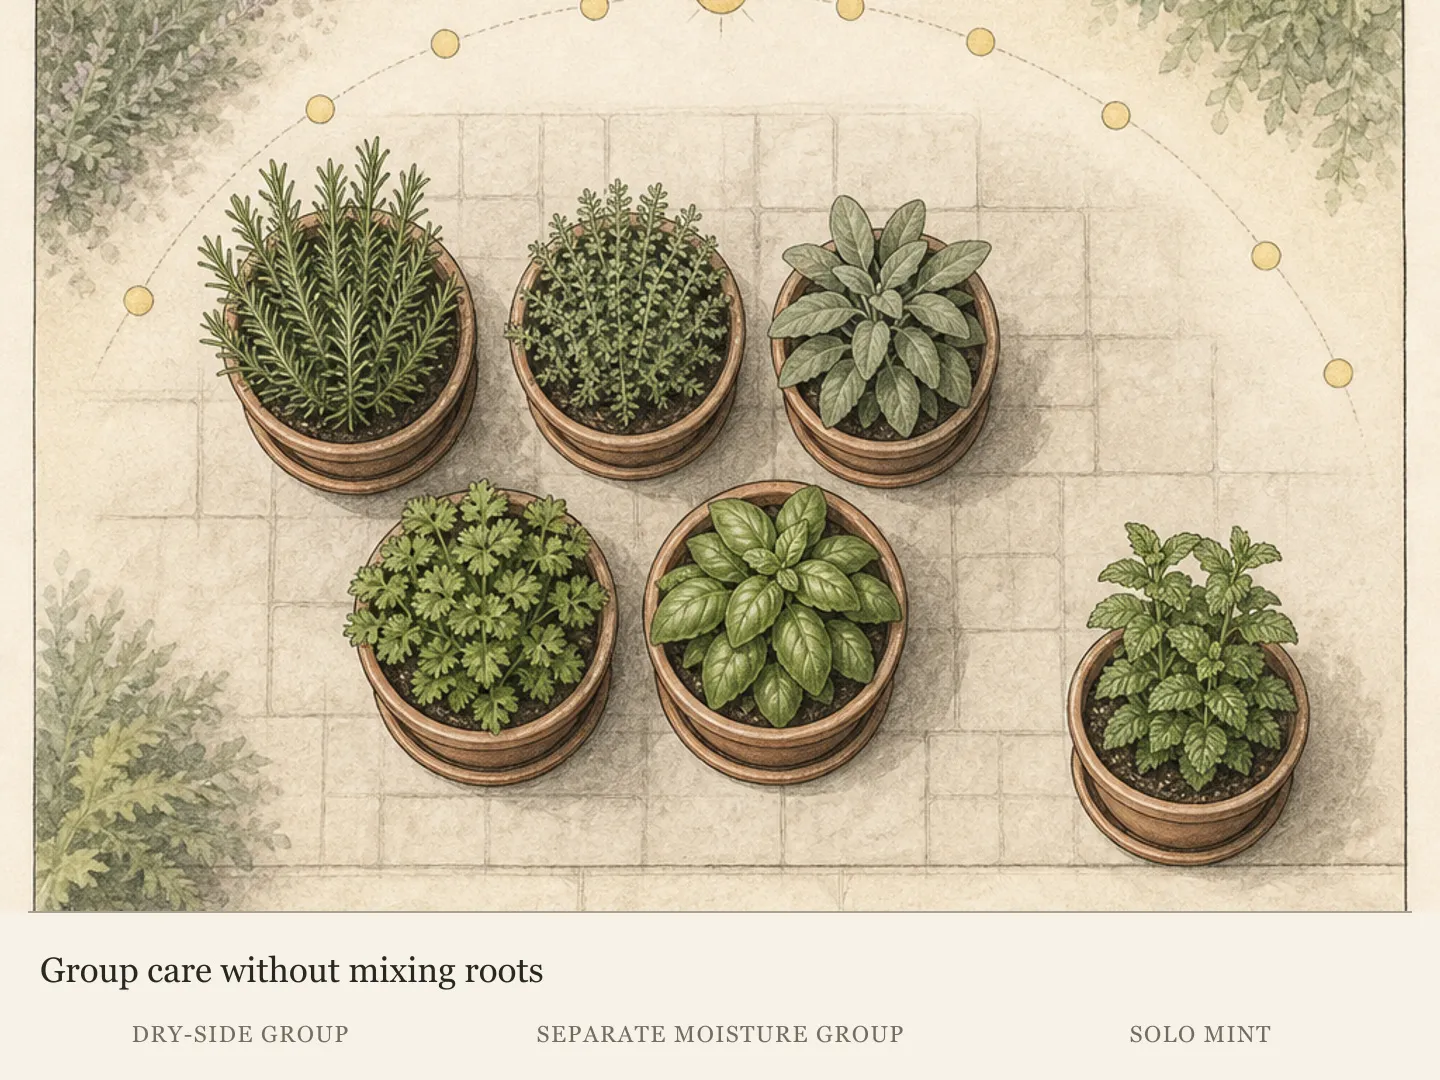
Use the Mediterranean dry-side group as a shortlist, not a recipe. Lavender, oregano, rosemary, sage, and thyme are candidates where full sun, sharp drainage, and local conditions suit the exact selections. Draw their mature outlines around the proposed root zone before combining them. If the documented footprints cannot fit with useful separation and visible crowns, distribute the plants among coordinated pots while retaining the same dry-side zone on the plan.
Build a steadier-moisture group by the same method. Verify each candidate independently, then decide whether the plants need one generous shared root volume or separate containers checked on a similar rhythm. Separate pots remain useful when mature sizes differ sharply or one plant may need to move. Visual proximity can still make those containers read as a family without merging their roots.
Give mint a designed solo position. Its spreading habit makes containment easier in its own pot, and independent placement keeps its roots from overwhelming quieter companions. Keep the pot accessible enough to inspect the surface and stems, and let its finish echo another container in the group. Isolation then reads as part of the composition rather than as a container added after the problem appeared.
Label every shared pot with the plants actually present. If one member declines or is replaced, reconsider compatibility before filling the vacancy. A replacement chosen only to restore a missing color may alter the watering logic for the whole root zone. Leaving the space open until a suitable plant is verified is a complete design decision, not an unfinished container.
Size each pot for roots and water behavior
Choose the container after the plant group is settled. Every pot needs unobstructed drainage holes and loose, well-drained mix intended for containers. Fit the volume to the combined root balls with space for growth, using the documented mature size as a second check. A cramped root zone can dry rapidly and restrict roots; a pot dominated by empty mix can stay wet long enough to create a different mismatch.
Pot scale also affects the care rhythm of the composition. Larger or moisture-demanding groups benefit from more root volume, while comparable small pots lose moisture faster. This does not justify assigning one universal size to a plant name. Use volume as a relative design control: enough for the selected roots and growth, but not so much unused wet mix that the intended zone behaves unlike the plants in it.
Inspect drainage before planting and keep it inspectable afterward. The finished arrangement should not press an outlet against a solid edge, conceal a saucer behind another pot, or send runoff across the walking route. Put the container on a stable surface where drainage can occur and collected water can be emptied. A decorative outer pot must not make the drainage path invisible.
When the mix check shows that a container needs water, wet that container thoroughly until drainage appears. Empty collected runoff after the pot drains. Then leave the other zones alone unless their own checks call for water. Moving through the display pot by pot preserves the central promise of the design: one visual garden, several observable root zones.
Review volume decisions after the plants settle into active growth. A pot that dries much faster than comparable neighbors may be too small for its occupants or unusually exposed; a pot that remains wet may contain too much unused mix, poor drainage, or an incompatible group. The observation identifies what to investigate. It does not authorize a larger pot, more water, or a new plant until the cause is clear.
Make separate pots read as one garden
Set a container palette before adding more plant variety. Repeating one material, rim profile, or quiet color across several sizes creates continuity without implying identical care. Use variation where the roots require it: a deeper volume for a larger group, a compact solo pot for mint, or a movable container for a seasonal anchor. The repeated detail makes those differences look intentional.
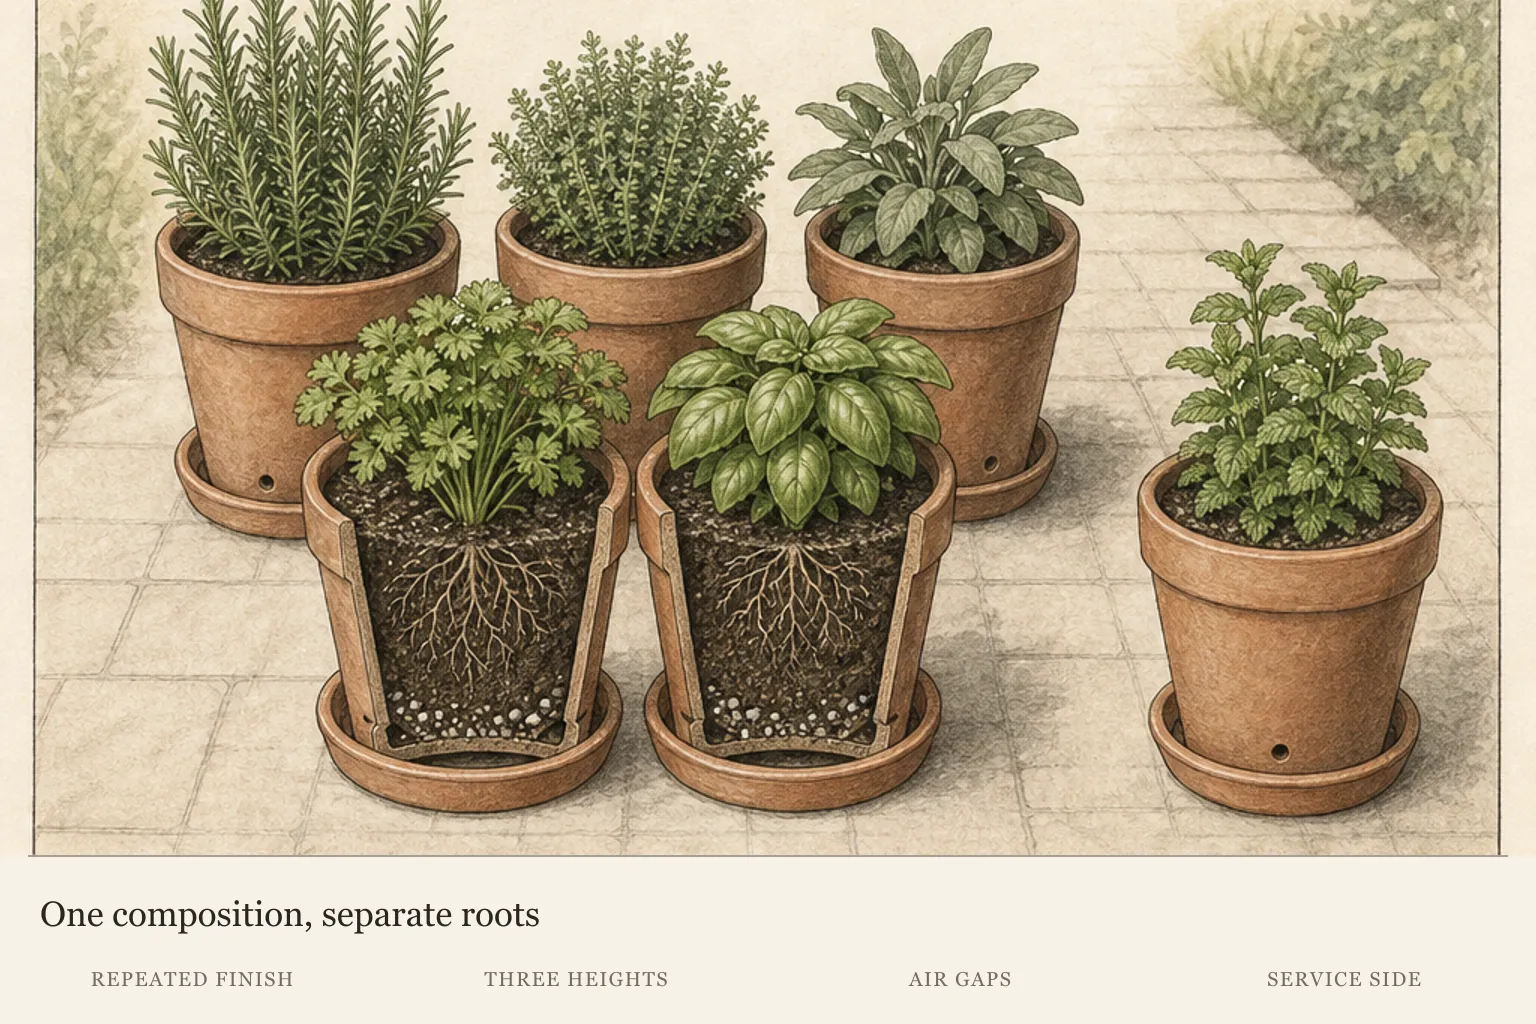
Compose with documented mature forms. An upright rosemary can provide a vertical anchor where its eventual footprint fits; mounding herbs can carry the middle; a trailing form can soften an edge where stems will not obstruct the route. Draw these silhouettes at full size and leave visible intervals between them. The open areas preserve plant outlines, access to the mix, and air around neighboring foliage.
Repeat one leaf color, texture, or growth form in separated positions, then keep the remaining signals restrained. The eye can connect silver foliage across unlike containers or follow a repeated rounded pot through two water zones. This is more durable than relying on simultaneous flowers, and it leaves room for herbs to change through the active season without dissolving the composition.
View the group from the approach and from the service side. The public view should reveal a clear anchor, supporting masses, and deliberate open space. The service view should reveal labels, mix surfaces, drainage points, and saucers. If one side succeeds only by hiding the other, turn or reorder the pots until both the composition and its care logic remain legible.
Test the visual framework by temporarily removing one supporting pot from the drawing. The remaining group should still show its repeated material and a usable service route; the vacant zone should not expose a container that can no longer be watered or drained. This edit identifies a composition that depends too heavily on a single tightly packed arrangement. A modular garden needs enough visual continuity and physical clearance to tolerate one plant moving for care without forcing every other root zone to move with it.
Allow seasonal change without rebuilding the root plan. A plant that must move for regional winter care can occupy an independent anchor pot, while the remaining containers retain their zones. A replacement should match the vacant position's light, mature scale, and water logic before it matches color. The repeated pot family can absorb that change without pretending the plants are interchangeable.
Preserve a service path through the composition
Arrange the containers in short rows, a loose triangle, or another compact geometry that keeps every pot within reach. Put frequently checked or quickly drying containers where their mix can be seen without lifting another pot. Face labels, saucers, and drainage checks toward one accessible edge. If a rear container requires leaning across foliage, the layout will invite shallow watering, missed runoff, and delayed observation.
Keep the path wide in functional terms: a watering can must pass without striking stems, and a pot must be removable without dismantling the whole display. Test that movement before plants reach mature width. Where the route narrows, reduce a container footprint or move the group. The care path is a permanent part of the design, even when visitors never notice it.
Use the first several watering cycles as a commissioning period. Check each root zone before watering, note how long drainage remains visible, and compare similar pots without assuming they should behave identically. Move a pot whose exposure clearly differs from the zone map, separate a plant that proves incompatible, and retain the labels that explain the revised arrangement.
Record revisions on the original sketch instead of relying on the final appearance. A new outline can show that a pot moved into stronger sun, that a shared group became two independent roots zones, or that a gap was widened for access. The record gives later observations context and prevents a successful correction from being undone during the next rearrangement. It also makes seasonal reassembly possible without treating last year's positions as universally suitable.
Turn a pot only when the new orientation still supplies the light its occupants require. Reordering for appearance can place a sun-dependent herb in a shaded pocket or hide the surface that needs inspection. Make aesthetic adjustments on the condition map, then watch the revised position through another cycle before treating it as settled.
A mature container herb garden remains editable. Plants grow, seasons change, and one root zone may need a different position while the others remain sound. Preserve the repeated finishes, visible silhouettes, and deliberate gaps that hold the group together, but let care observations govern each move. The garden succeeds when its unity survives honest differences in watering and access.
Place three separate root zones on a Pennsylvania patio
A sunny 12-by-5-foot display area in Pennsylvania Zone 6 can hold one Lavandula angustifolia, one Salvia rosmarinus and one Allium schoenoprasum in three separate draining containers. Mark plant centers 2, 6 and 10 feet from the left edge, all 2.5 feet from the front. Reserve canopy allowances of 3, 4 and 2 feet respectively, increasing any allowance required by the exact stock. These circles describe plant space, not recommended pot diameters; choose the containers for their actual root balls and continued growth.
The three-pot count gives each herb its own moisture check. Chives can receive water while the lavender or rosemary remains adequately moist, with no shared saucer transferring runoff between them. Keep a service route outside the measured display and test safe movement before the pots are full. Rosemary needs an appropriate winter destination in this example, and container-grown lavender and chives need their own regional root-protection plan: an in-ground hardiness rating does not settle exposed-pot survival.
Design ideas
- Style
- Modular herb garden with repeated containers
- Space
- Sunny patio, stoop, or structurally approved balcony
- Climate
- Outdoor active-season conditions, adjusted to regional herb labels and local guidance
- 1Build a two-zone herb family
Place a confirmed dry-side group on one side of the composition and a verified steadier-moisture group on the other. Give each zone its own reachable mix surface and drainage path. Connect the two with one repeated container color and one repeated plant form, such as upright foliage at both ends. Leave enough space between zones that a watering can can serve either group without wetting the other by habit, and keep a label visible at the boundary.
- 2Give mint a designed solo pot
Set mint in its own draining container at an outer corner where the mix and stems remain visible. Choose a pot finish already used by the larger group, then repeat mint's rounded foliage elsewhere through a compatible plant form rather than shared roots. The solo position should lift out independently for inspection or relocation. Keep the open side of the pot facing the service route so containment remains an active practice through the growing season.
- 3Repeat one form at three heights
Choose related pot profiles in low, medium, and tall versions, assigning each size only after the occupants' roots and mature growth are known. Use the tall pot as an anchor, the medium pots to carry the main rhythm, and the low pot to open the front edge. Because the silhouette repeats, the three volumes can belong to different watering zones without appearing unrelated. Keep every drainage outlet accessible from the same service side and every mature plant clear of the route.
- 4Keep a narrow service side
Arrange a composed public face and a plainly functional rear edge. Turn labels, saucers, drainage outlets, and clear views of the mix toward the rear, then verify that every pot can be removed along that line. Use repeated rims and plant silhouettes on the visible side to maintain order. This layout suits a wall or railing only when the service strip remains reachable; a hidden rear edge that cannot be entered is not a service side and will not support independent checks.
- 5Use a movable seasonal anchor
Let a structurally bold rosemary or lavender hold one end of the active-season arrangement where the exact plant fits the light and regional conditions. Keep it in an independent draining pot whose footprint is drawn at mature size. Repeat that pot's finish in a permanent container near the opposite end, so the composition retains visual balance if the anchor must move for winter care. The vacant position can remain open until the original returns or a compatible replacement is verified for that zone.
- 6Leave one deliberate gap
Reserve an open space approximately equal to the smallest pot in the family and connect it to the service route. The gap exposes the silhouettes of neighboring herbs, protects access to their mix and drainage, and provides a place to set down a pot during inspection. It may later receive another herb only after light, mature size, root volume, and water need are checked. Until then, the emptiness is part of the arrangement's rhythm and maintenance capacity.
Plants in this guide
Related reading
Sources
- Growing Herbs in Containers. University of Illinois Extension. Source record · Accessed 2026-08-15.
- Container gardening basics. Oregon State University Extension Service. Source record · Accessed 2026-08-15.
- Growing Herbs in the Garden. Penn State Extension. Source record · Accessed 2026-08-15.
- Container Size. University of Illinois Extension. Source record · Accessed 2026-08-15.
- English Lavender - Lavandula angustifolia. North Carolina Extension Gardener Plant Toolbox. Source record · Accessed 2026-09-09.
- Salvia rosmarinus. North Carolina Extension Gardener Plant Toolbox. Source record · Accessed 2026-09-09.
- Growing chives in home gardens. University of Minnesota Extension. Source record · Accessed 2026-09-09.