Grow · overwintering
Overwintering Rosemary Indoors
Move container rosemary inside before frost only if you can provide very bright light, cool conditions, drainage, and air movement through winter.
Published Last updated
In this guide
- Decide whether the room can supply a complete winter station
- Use the pre-frost interval to remove setup failures
- Establish a winter moisture baseline at the roots
- Investigate brown tips before reaching for the watering can
- Separate humidity around leaves from water around roots
- Let limited growth simplify the winter routine
- Return outdoors after frost with a staged exposure
- Steps
Decide whether the room can supply a complete winter station
Indoor overwintering is workable when an already-containerized rosemary can receive very bright light, cool conditions, free drainage, and moving room air through winter. The room must provide all four. A dim basement may be cool but leaves the foliage short of light; a sunny enclosed corner may be bright but hold warm, stagnant air around the canopy. Decide where the pot will live before cold weather makes the move urgent.
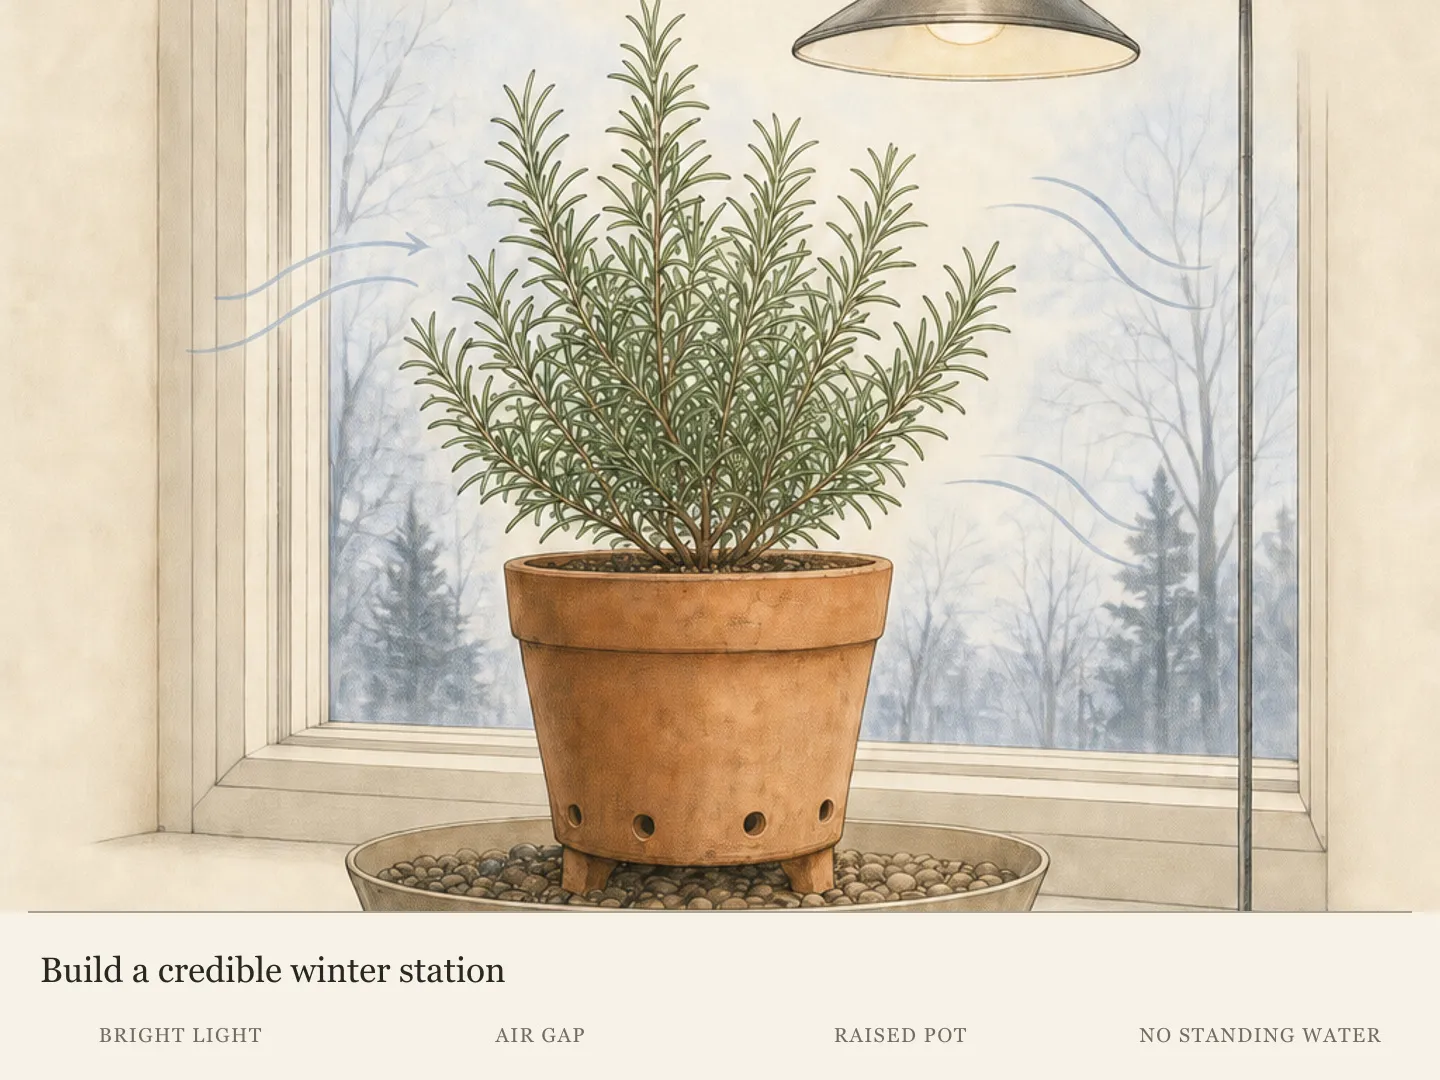
Use the brightest practical window, preferably a sunny southern exposure, or provide suitable supplemental light. Then look beyond the light beam. The pot needs a waterproof surface where drainage can finish, open space around the foliage, and separation from cold glass and direct heating outlets. A station that requires the container to sit in runoff or the branches to press into a crowded window does not yet solve the winter problem.
Cool and bright is a useful pairing because rosemary commonly makes little growth under winter conditions. A warm room does not compensate for weak light, and extra water cannot correct either mismatch. If the home has no suitably bright window and no supplemental light, keeping the plant in a dim room asks the root zone and foliage to endure conditions the setup cannot balance. In that case, replacing the plant in spring is a more realistic plan than treating survival as a watering challenge.
Check local hardiness and the particular plant before committing to the move. Rosemary can overwinter outdoors in climates and sites where it is hardy, while container plants in colder regions need protection. This procedure addresses the latter situation. It does not establish one national temperature cutoff, and it does not recommend digging an established garden shrub for a hurried autumn transfer.
Use the pre-frost interval to remove setup failures
Penn State Extension advises moving potted rosemary indoors two to three weeks before the expected first frost. Treat that interval as preparation time, not a fixed national date. Local frost timing determines the calendar. Moving before the last moment gives you time to confirm the light, drainage path, and physical fit while outdoor conditions have not yet forced an emergency placement.
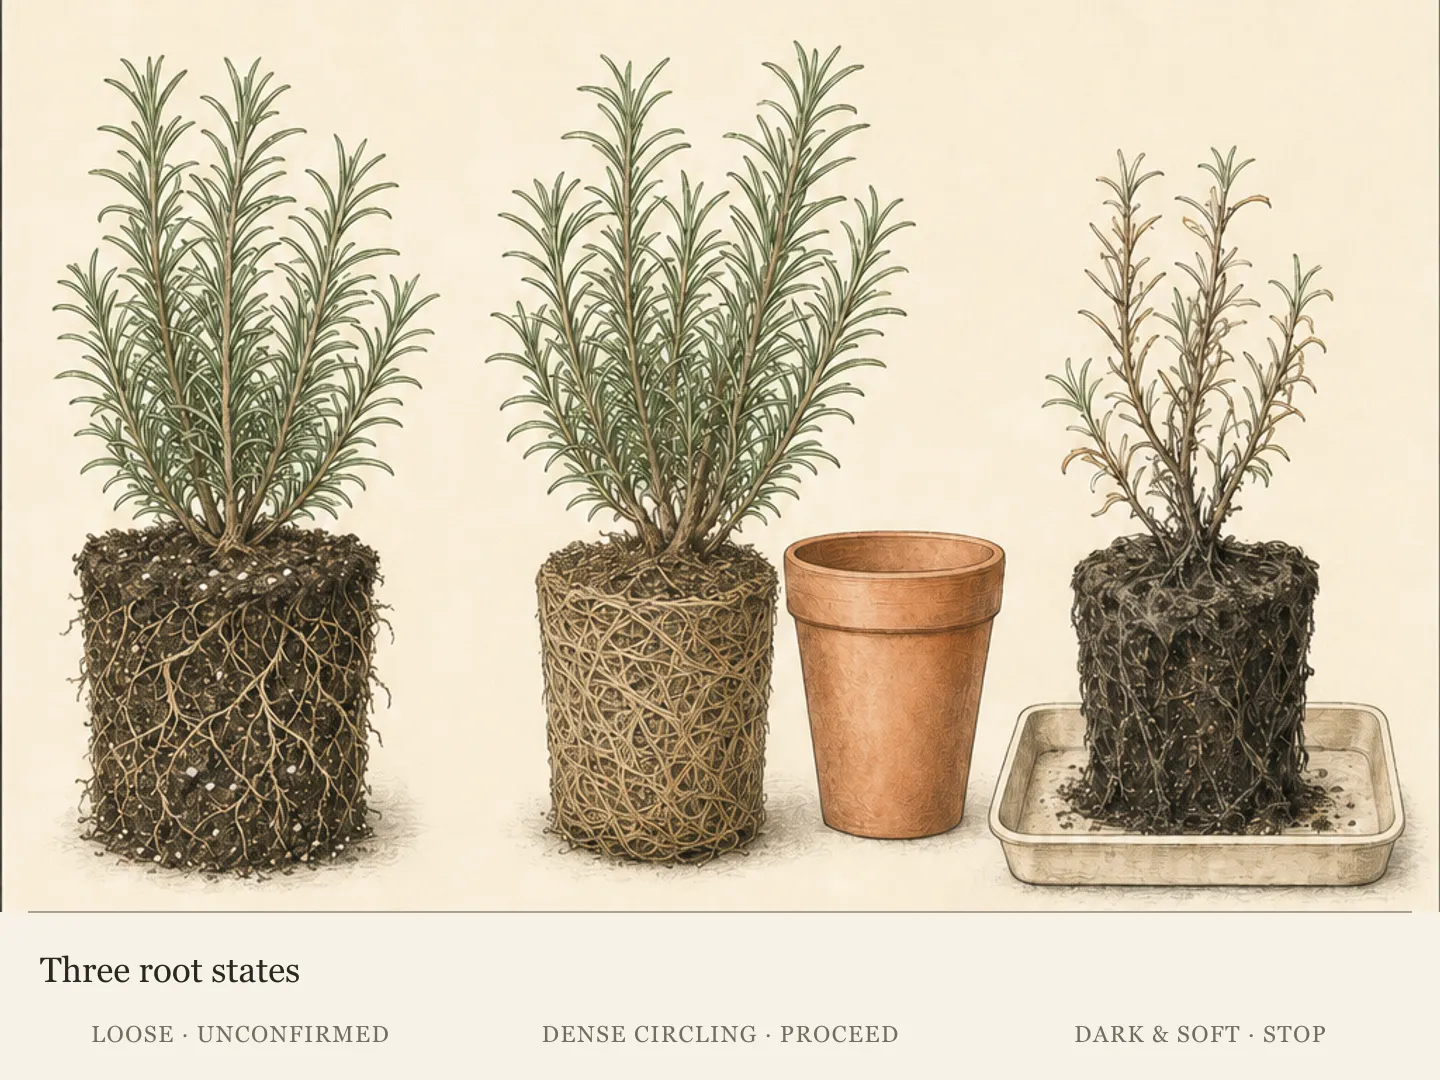
Bring the rosemary inside in its established draining container. University of Illinois Extension recommends container culture for plants that will move indoors because rosemary does not transplant well in fall. Digging a garden-grown shrub adds a root disturbance to the abrupt changes in light, temperature, and humidity. An established potted plant arrives with the same root ball and pot, making the room itself the principal new variable.
Inspect the drainage route while the pot is easy to handle. Water must be able to leave the container, pass into a tray or sink, and be removed after dripping stops. A decorative outer pot can collect runoff out of sight, so lift the inner pot and confirm that its base will remain above any standing water. Correct a blocked or unusable drainage arrangement before it becomes part of every winter moisture decision.
Set the container in one stable station with foliage clear of cold glass, neighboring plants, and direct heat. Stability makes observations comparable. When a pot rotates among a dark room, a hot room, and a bright cool window, each position changes water use and leaf exposure. A consistent station allows a dry tip, a lighter pot, or slow growth to be interpreted against known conditions.
Establish a winter moisture baseline at the roots
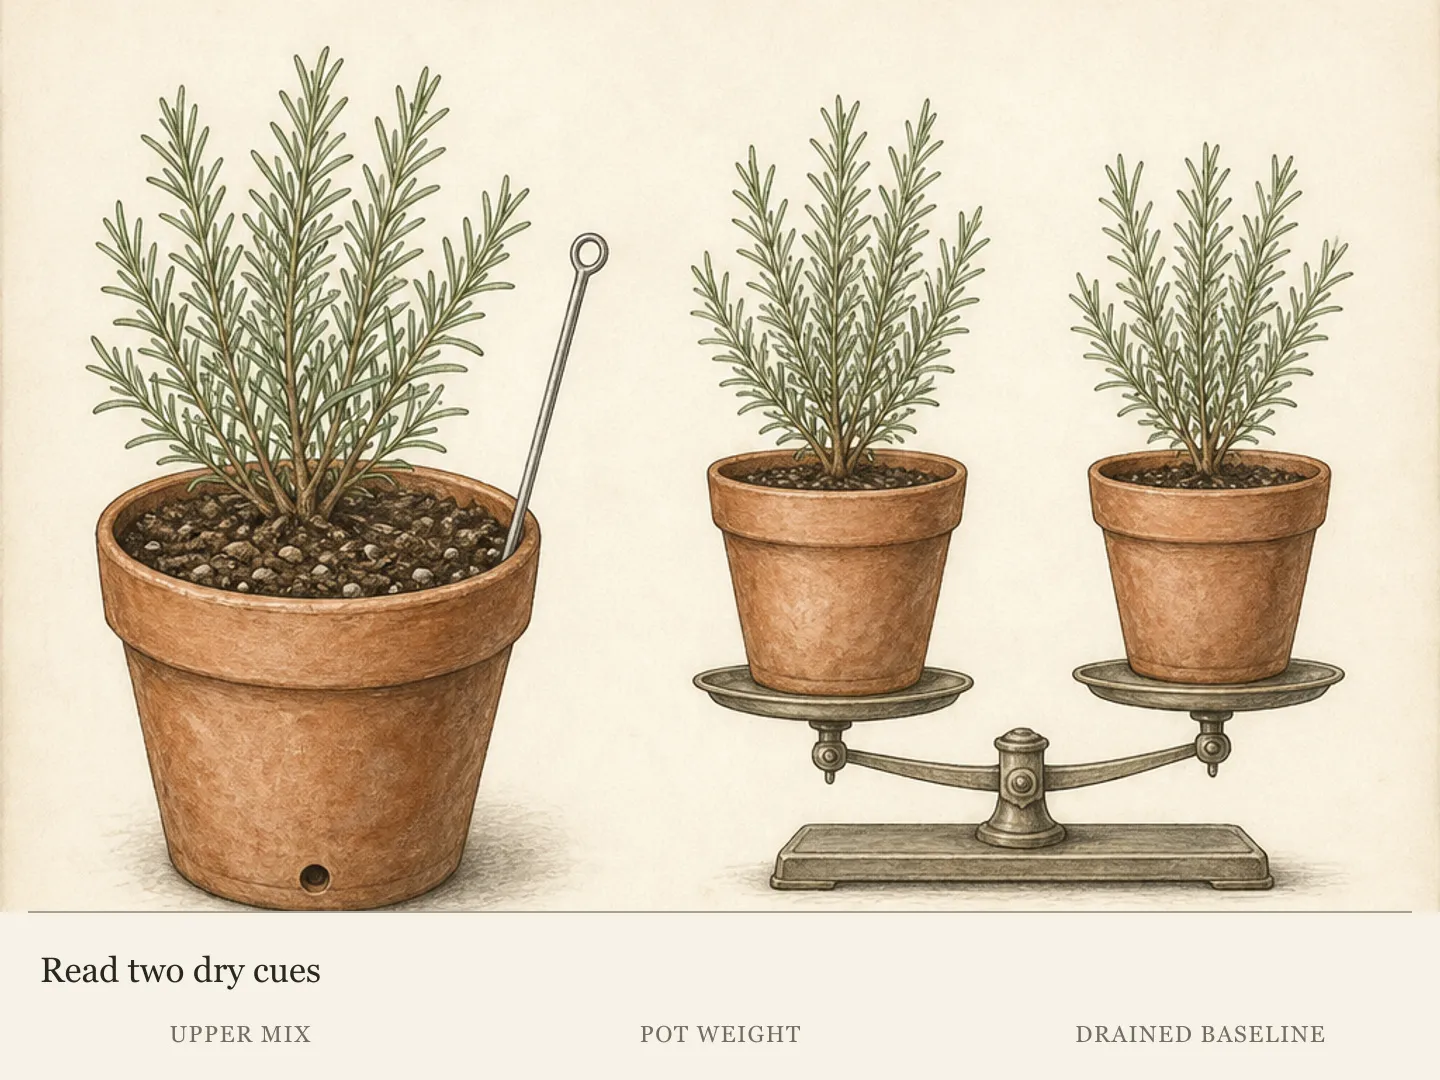
Winter watering begins with a comparison, not a weekday. When the upper mix is dry, water the root ball evenly until excess exits the drainage holes, allow the pot to finish dripping, and empty the collected runoff. Then note the feel of the upper mix and the weight of a manageable container. That freshly drained state becomes the wet reference for later checks.
As the mix dries, press a finger into the upper inch and compare the pot's weight with the reference. Rosemary is kept on the dry side between waterings, but the phrase describes the interval, not an incomplete watering event. Once the moisture cues show that water is needed, wet the root ball thoroughly and let the surplus escape. Small repeated sips can leave the condition of the full root ball unknown.
The interval will usually lengthen when the plant makes little growth in cool, low-light winter conditions. That change is an observation, not a rule that every pot follows. Light level, room conditions, pot size, and the established root ball all affect how quickly the mix changes. Return to the upper-inch and pot-weight checks, using the same stable station so a comparison means something.
A saucer or cachepot completes its job by protecting the indoor surface while water drains. It must then be emptied. Leaving the container in collected water turns a complete irrigation into prolonged root saturation. If drainage is slow, the pot remains unexpectedly heavy, or the upper mix stays wet, investigate that physical condition before adding another dose.
Investigate brown tips before reaching for the watering can
Indoor rosemary can develop dry brown leaf tips, but that symptom does not prove a dry root ball. University of Illinois Extension specifically warns against answering dry-looking foliage with more water before checking the roots. Wet roots can decline while the leaves still appear dry. Read the upper mix, pot weight, drainage behavior, and foliage together.

Wait while the upper mix remains damp and the pot still feels near its drained weight. Additional water would extend the wet interval without resolving low light, warm air, or dry room air. Confirm that runoff is not trapped beneath the pot and that the drainage holes remain functional. The immediate task is to identify the limiting condition, not to make the surface look freshly watered.
A dry upper inch and a clearly lighter container authorize an even watering until drainage appears, followed by removal of the runoff. Observe the plant in the same station after that complete cycle. This response is tied to root-zone evidence, so it remains appropriate even when the symptom that prompted the check was on the foliage.
A sudden change in leaf condition should also prompt a station review. Compare current light, airflow, and proximity to cold glass or hot outlets with the original setup. Correct an obvious environmental mismatch and keep the moisture method stable. Changing location, watering frequency, and root wetness at the same time makes it difficult to tell which condition is still active.
Separate humidity around leaves from water around roots
A pebble tray can raise humidity immediately around the foliage as its water evaporates. Fill the tray so water sits among the pebbles while the rosemary pot remains above the water line. The drainage holes and pot base must stay out of the reservoir. The tray works through the air next to the leaves; it is not a way to keep the root ball continuously wet.
Check the tray and the pot as separate systems. Water may remain available for evaporation below the pebbles while the container mix follows its own dry-side cycle. If the pot settles into the water or roots reach standing runoff, the arrangement has crossed from local humidity into root saturation. Raise the container securely and remove excess water until the drainage plane is clear.
Humidity also does not replace circulation. Penn State Extension notes that adequate air movement helps reduce powdery mildew risk. Leave open room around the canopy so air can pass between the rosemary and nearby objects. A bright window crowded with foliage can create a still pocket even when the wider room feels comfortable.
Gentle room circulation differs from placing the plant in a direct heater or fan stream. A strong hot draft can dry foliage rapidly and distort the moisture clues you are trying to interpret. Keep the station outside the direct path while preserving open air around the branches. The useful result is a bright, cool location with local humidity available and no stagnant enclosure.
Let limited growth simplify the winter routine
Rosemary commonly makes little growth in cool, low-light winter conditions. A quiet canopy is therefore compatible with the holding season when foliage remains sound and the root zone behaves normally. Compare the plant with its own recent condition rather than expecting summer extension at a window. The winter objective is continuity through a constrained season, not sustained harvest production.
Withhold fertilizer while the plant is not actively growing. Fertilizer does not correct insufficient light or a wet root zone, and a low-growth plant does not need to be pushed simply because the calendar says it has been indoors for several weeks. Keep attention on the bright station, cue-based watering, drainage, local humidity, and open air.
Use repeated observations to distinguish stable dormancy-like restraint from decline. A pot that gradually lightens, receives a complete watering, drains freely, and returns to its slower cycle provides a coherent pattern. Increasing brown tissue while the mix remains wet, or continuing decline after the strongest environmental mismatch is corrected, calls for closer diagnosis. Avoid chasing that pattern with alternating extra water and fertilizer.
Minor housekeeping should preserve visibility around the crown and pot surface. Keep fallen material from concealing the mix check, make sure the container has not settled into tray water, and verify that branches have not grown or shifted against the glass. These checks maintain the conditions selected at setup without introducing a new routine simply to make winter feel active.
Return outdoors after frost with a staged exposure
The indoor period ends after local frost danger has passed, not on a universal spring date. Keep using local weather and frost information to choose the first outings. A bright window does not reproduce the combination of outdoor sun, wind, and changing temperature, so survival indoors is not evidence that the plant is ready for its full summer position.
Begin with protected daytime exposure and bring the container back to safety as conditions require. Increase the duration outdoors and the amount of sun gradually. This staged return allows the rosemary to adjust while the gardener can still observe foliage and root-zone moisture under the new demand.
Reestablish the outdoor watering baseline as exposure increases. Sun and moving outdoor air can change how quickly the pot lightens, so the indoor interval should not be carried outside unchanged. Keep the same decision method: inspect the upper mix and pot weight, water thoroughly when the cues agree, and let excess drain.
The transition is complete when the pot can occupy its ordinary outdoor site after frost risk without an abrupt jump from protected glass to full exposure. At that point winter maintenance gives way to active-season care. The useful record from indoors is the relationship among light, root-zone moisture, drainage, and leaf response, which remains more reliable than any fixed watering day.
Steps
- Level
- moderate
- Time
- One setup session, followed by winter observation
- Tools
- Watering can, Pebble tray, Optional supplemental grow light
- Materials
- Established rosemary in a draining container, Clean pebbles
- 1Check local hardiness and the indoor site
Confirm that the rosemary needs winter protection in the local climate and is already growing in a container. Reserve the brightest cool location available, preferably a sunny southern exposure or a station with suitable supplemental light. Require open air around the canopy, a waterproof surface, and a drainage route that can be emptied. Test the physical fit with the actual pot: branches should clear the glass and neighboring foliage, and the draining container must sit above runoff. If adequate light is unavailable, reconsider indoor holding before the move.
- 2Move the container ahead of frost
Use the two-to-three-week period before the expected first frost to bring an established potted plant indoors and test the station. Keep the plant in its draining container; avoid digging a garden-grown rosemary solely for a late transfer. Check that drainage holes are open, runoff can be removed, and the foliage fits without touching cold glass, neighboring plants, or direct heat outlets. Correct a blocked outer pot or crowded placement now, while there is still time to choose another surface or station before frost.
- 3Set light and airflow first
Place the rosemary at the selected bright window or under suitable supplemental light, then leave it in a stable position. Keep branches clear of cold glass and out of direct heater or fan streams. Open space around every side should allow gentle room circulation. Confirm that a saucer or cachepot protects the surface without holding the container base in collected water. Record this initial arrangement so a later leaf change can be compared with known light, airflow, and root conditions rather than a series of room changes.
- 4Establish a moisture baseline
When the upper inch of mix is dry, water the root ball evenly until excess exits the holes. Let the pot finish dripping and empty all runoff. Feel the upper mix and note the weight of a manageable container in this freshly drained state. At each later check, pair the finger test with the weight change and inspect the saucer for trapped water. Use agreement between those observations to authorize another complete watering; do not carry an outdoor weekday schedule into winter or answer a brown tip by reflex.
- 5Balance humidity with the winter routine
If indoor air is dry, set the pot securely above water in a pebble tray, keeping the base and drainage holes above the water line. Preserve open air around the foliage and keep direct hot drafts off the canopy. Expect limited winter growth and withhold fertilizer while the plant is inactive. When tips brown, inspect upper-mix moisture, pot weight, drainage, light, and airflow before deciding whether water is needed. Wait when the roots are still wet; water through and drain only when the dry cues agree.
- 6Recheck the same station through winter
At each moisture check, look for branches touching glass, a pot settled into tray water, crowded air around the canopy, or a change in available light. Clear fallen material from the mix surface so the upper-inch test remains readable. If foliage declines while the pot stays heavy and wet, stop adding water and inspect drainage and placement. If the pot is lighter and the upper mix is dry, complete one thorough watering and remove the runoff. Keep the plant in the corrected stable station long enough to observe the response.
- 7Acclimate the plant outside
Wait until local frost danger has passed. Begin with protected daytime outings and return the plant to shelter as conditions require. Increase outdoor time and sun exposure in stages before moving the pot to its ordinary summer position. Watch the foliage and root-zone moisture after each increase; the plant has been conditioned to winter glass, not immediate full outdoor exposure. As light and wind increase, establish a new pot-weight and upper-mix rhythm rather than keeping the slower indoor watering interval.
Plants in this guide
Related reading
Sources
- Rosemary. University of Illinois Extension. Source record · Accessed 2026-08-15.
- Herb Garden Plants: Rosemary. Penn State Extension. Source record · Accessed 2026-08-15.
- Overwintering Tender Plants. University of Illinois Extension. Source record · Accessed 2026-08-15.